We’re excited to share that you now have the flexibility to customize the backgrounds for your Live Interviews! You can upload multiple background images and choose a default background that will automatically appear whenever you join an interview.
Please follow the steps below to configure your interview backgrounds:
1. Adding the background images on the company level.
1. Navigate to the Company Profile section.
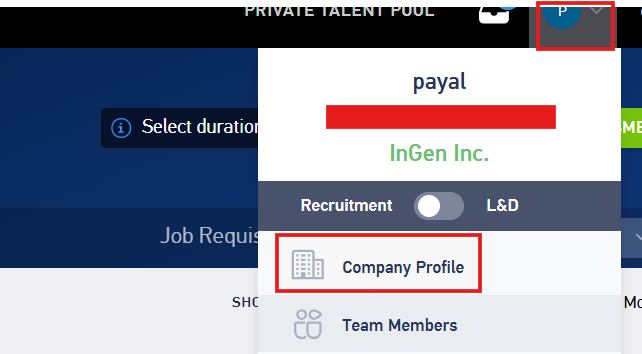
2. Select Multimedia from the left-hand navigation panel.

3. Scroll down to locate the Interview Backgrounds section.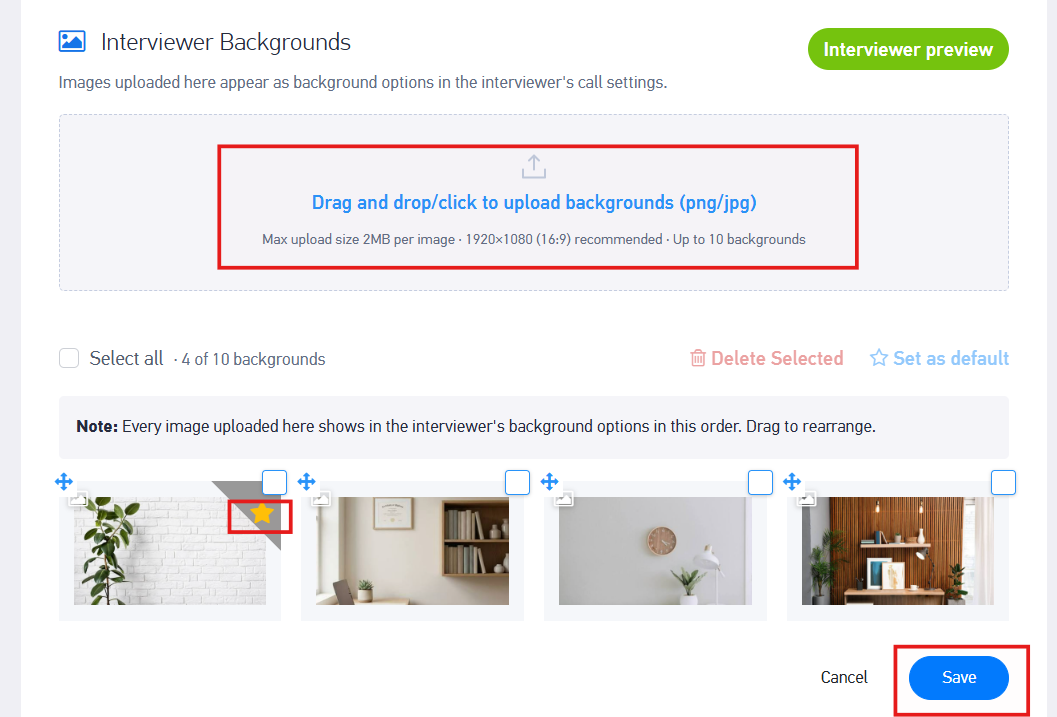
4. You can upload up to 10 background images of your choice.
5. Please ensure that each image is within the maximum file size limit of 2 MB.
6. Click on the Drag and Drop area to upload images directly from your system.
7. Once uploaded, you can click on the Star icon next to an image to mark it as the default background.
How Does the Default Background Work?
Once you mark an image as the default using the Star icon, it will automatically be applied as your background whenever you join a Live Interview. This saves you the effort of manually selecting a background each time.
2. Set the background image on time during the Interview
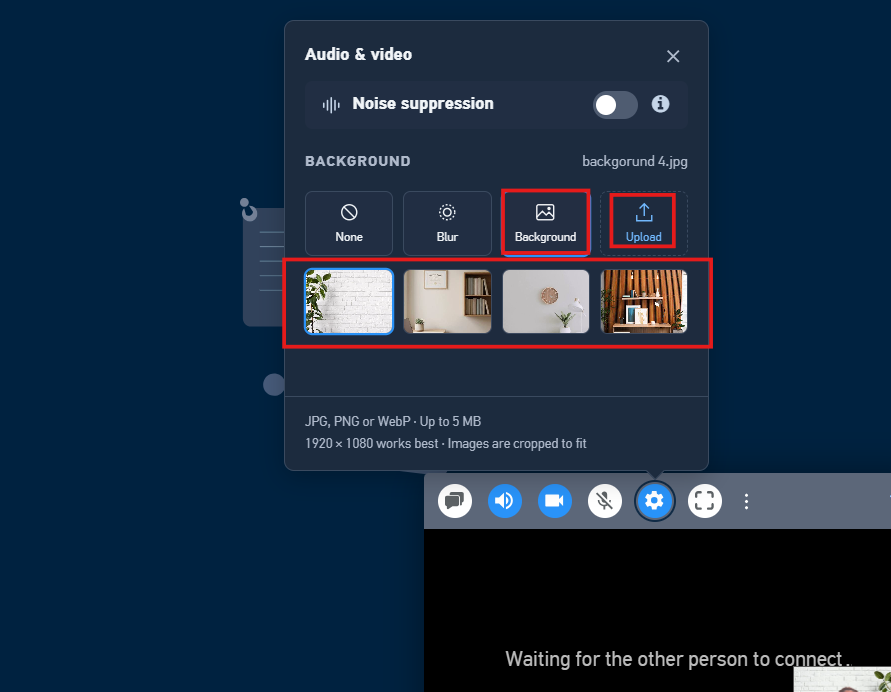
1. Once your video camera is turned on, click on the Settings icon, as shown in the image.
2. Under the Backgrounds section, you can upload a new background image or select any of the images that were previously added before the interview.
3. You can also choose to Blur your background or select None if you prefer to keep your original background without any modifications.
Was this article helpful?
That’s Great!
Thank you for your feedback
Sorry! We couldn't be helpful
Thank you for your feedback
Feedback sent
We appreciate your effort and will try to fix the article